Thermal Pads

Right Thermal Pads Can Prolong the Life of a Graphics Card

Thermal Pads

A graphics card is one of the most important components of a gaming PC, but it also generates a lot of heat during operation. To prevent overheating and damage, a graphics card needs proper cooling, which involves not only a fan and a heatsink but also thermal pads.


What are thermal pads and why are they important?


It is a thin sheets of material that are used to transfer heat between two surfaces. They are often used in electronic devices to dissipate heat from hot components, such as processors and graphics cards.


What do they do?

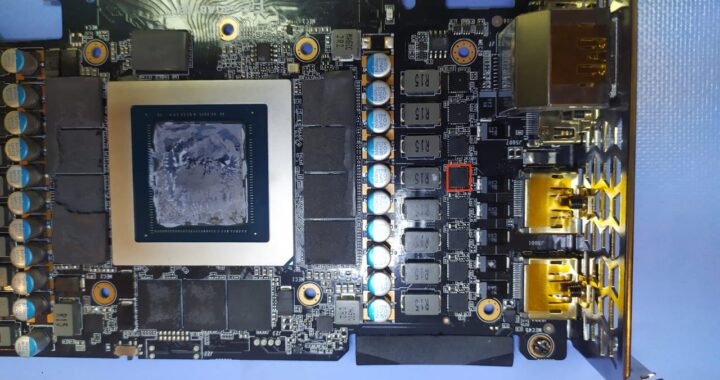
It help transfer the heat to the copper heatsinks in GPUs as the VRAMs, VRMs, and even the MOSFETs (in some cases) don't generally interact with the copper heat spreader as the main die would (the main GPU core/chip) with thermal paste, since there's always a space between them¹. Thermal paste is a semi-solid substance that is used to fill the tiny air gaps that are left behind when the heatsink sits on the processor or any other chip.

What is the use it?

It is generally used for components that generate lesser heat compared to a CPU, which include memory chips, VRM, motherboard chipset/northbridge/southbridge or Platform Hub Controller (PCH), or other ICs. They are also used in consoles, game stations, and some laptops where the CPU or GPU is relatively less powerful and generates lesser heat compared to faster processors used in computers. They are also great for DIY cooling for routers, repeaters, and other heat-generating components.


Why choose the right thermal pads?

Choosing the right thermal pads can prolong the life of a graphics card by ensuring optimal heat transfer and preventing thermal throttling, which is when the performance of the graphics card is reduced to lower its temperature. Thermal throttling can cause stuttering, lagging, and reduced frame rates in games, which can affect the gaming experience.


How to choose the right thermal pads for your graphics card?

There are several factors to consider when choosing thermal pads for your graphics card, such as:


Thickness

The thickness of the thermal pad should match the gap between the component and the heatsink. If the thermal pad is too thick, it can crush the component under pressure or cause an uneven board where some parts may interact with the heat spreader and some won't. If the thermal pad is too thin, it may not fill the gap and leave air pockets that reduce heat transfer. The thickness of thermal pads usually ranges from 0.5mm to 3mm.

Thermal conductivity

The thermal conductivity of the thermal pad measures how well it can transfer heat from one surface to another. The higher the thermal conductivity, the better the cooling performance. However, higher thermal conductivity also means higher prices and lower flexibility. The thermal conductivity of thermal pads usually ranges from 1 W/mK to 20 W/mK.

Adhesiveness

Some thermal pads are self-adhesive, which means they have a sticky layer on both sides that can attach to the component and the heatsink without any glue. This makes them easier to apply and remove, but they may also leave some residue behind. Non-adhesive thermal pads require some glue or tape to secure them in place, which can be more difficult to apply and remove, but they also leave no residue behind².

Size

The size of the thermal pad should match the size of the component that needs cooling. If the thermal pad is too large, it can overlap with other components or parts of the board which may cause short circuits or interfere with airflow. If the thermal pad is too small, it may not cover the entire surface of the component and leave some hot spots that reduce the cooling efficiency. The size of thermal pads usually ranges from 10mm x 10mm to 100mm x 100mm².


How to apply thermal pads to your graphics card?


Before applying thermal pads to your graphics card, you need to prepare some tools and materials, such as:


- Screwdriver

- Pair of tweezers

- Pair of scissors

- Some alcohol wipes

- Paper towels

- Pair of gloves


Then you can follow these steps:


Step 1

Turn off your PC and unplug it from the power source. Remove the side panel of your PC case and locate your graphics card. You may need to unscrew some screws or release some clips to remove them from the PCIe slot. Be careful not to touch any metal parts or components on the graphics card or the motherboard.

Step 2

Place your graphics card on a clean and flat surface. Use a screwdriver to remove the screws that hold the fan and the heatsink to the graphics card. Gently lift the fan and the heatsink from the graphics card and set them aside. You may need to twist or wiggle them slightly to break the seal of the old thermal paste or pads.

Step 3

Use some alcohol wipes and paper towels to clean the old thermal paste or pads from the graphics card and the heatsink. Make sure there is no residue left behind. You can use a pair of tweezers to peel off any stubborn thermal pads. Be careful not to damage any components or circuits on the graphics card or the heatsink.

Step 4

Cut your new thermal pads to fit the size of the components that need cooling, such as the VRAMs, VRMs, and MOSFETs. You can use a pair of scissors or a knife to cut them, but make sure they are sharp and clean. You can use the old thermal pads as a reference for the size and thickness, or measure them with a ruler or a caliper.

Step 5

Peel off one side of the protective film from the thermal pad and stick it to the component that needs cooling. Press it firmly and evenly to ensure good contact. Then peel off the other side of the protective film and stick it to the corresponding part of the heatsink. Repeat this process for all the components that need thermal pads.

Step 6

Apply a small amount of thermal paste to the center of the GPU core/chip. You can use a pea-sized, rice-sized, or X-shaped dot, depending on your preference and experience. Do not spread it with your finger or a tool, as this may create air bubbles or uneven coverage.

Step 7

Align the fan and the heatsink with the graphics card and gently place them on top of it. Make sure they are in contact with all the thermal pads and paste. Screw them back in place with a screwdriver. Do not overtighten them, as this may damage the components or cause uneven pressure.

Step 8

Reinstall your graphics card in your PC case and connect it to the power source and monitor. Put back the side panel of your PC case and plug in your PC to the power source. Turn on your PC and check if everything is working properly. You can use some software tools to monitor your graphics card’s temperature and performance.


Conclusion


Thermal pads are essential for keeping your graphics card cool and prolonging its life span. Choosing the correct pads for your graphics card depends on several factors, such as thickness, thermal conductivity, adhesiveness, and size. Applying thermal pads to your graphics card requires some tools and materials, as well as some patience and caution. By following these steps, you can improve your graphics card cooling and enjoy a better gaming experience.

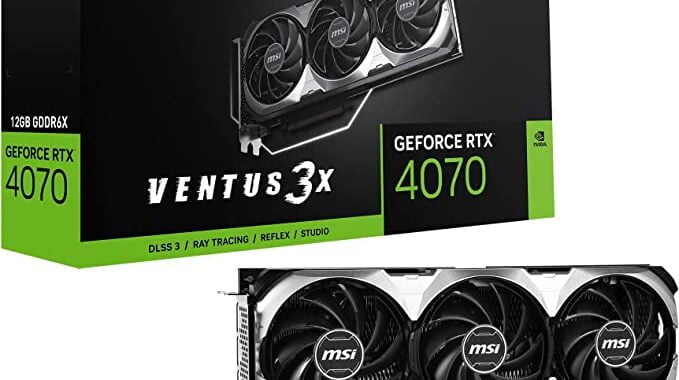
MSI-RTX-4070

NVIDIA GeForce RTX 4070: The Midrange King

NVIDIA has launched a new high-end graphics card, the GeForce RTX 4070, which promises to deliver outstanding performance at resolutions of 1440p and beyond. The card is based on NVIDIA's new Ada Lovelace architecture, featuring improved streaming multiprocessors, tensor cores, and ray tracing cores. It also supports DirectX 12 Ultimate, DLSS 3, and NVIDIA Reflex technologies.

NVIDIA GeForce RTX 4070 - Specifications and Features

The RTX 4070 has impressive specifications, with a GPU clock of 1920 MHz and a boost clock of 2475 MHz. It boasts 5888 CUDA cores, 184 tensor cores, and 46 ray tracing cores. It comes equipped with 12 GB of GDDR6X memory running at 21 Gbps on a 192-bit bus. The card has a TDP of 200 W and requires a single 16-pin power connector. It has four display outputs: one HDMI 2.1 and three DisplayPort 1.4a.

NVIDIA GeForce RTX 4070 - Performance

The RTX 4070 is designed to offer significant performance improvements over previous generation cards such as the RTX 3070 and RTX 3070 Ti. According to NVIDIA, the RTX 4070 is up to 2x faster than the RTX 3070 and up to 1.5x faster than the RTX 3070 Ti in games that use ray tracing and DLSS. The card also consumes less power than its predecessors, thanks to its efficient 5 nm process and new streaming multiprocessors.

Gaming

The RTX 4070 is the ideal choice for gamers looking to play the latest titles at high settings and resolutions, with realistic lighting effects and smooth frame rates. The card can handle demanding games such as Cyberpunk 2077, Battlefield 2042, Far Cry 6, and more with ease. The card also supports DLSS 3, which uses AI to upscale lower-resolution images to higher resolutions without sacrificing quality. DLSS 3 can boost performance by up to 4x compared to native rendering.

Creative Workflows

In addition to gaming, the RTX 4070 is an excellent tool for creators. The card supports NVIDIA Studio, which offers a suite of features and applications that enhance creative workflows. With its powerful tensor cores and optical flow accelerator, the card can accelerate tasks such as 3D rendering, video editing, graphic design, and more. The card also comes with NVIDIA Studio drivers, which are optimized for stability and compatibility with popular creative software.

NVIDIA GeForce RTX 4070 - Availability and Pricing

The RTX 4070 is available now for $599 from various third-party manufacturers. Some of the best variants include the MSI Gaming X Trio, the ASUS ROG Strix OC, the EVGA FTW3 Ultra, and the Gigabyte Aorus Master. These cards offer superior cooling solutions, RGB lighting effects, overclocking potential, and additional features.

NVIDIA GeForce RTX 4070 - Comparisons and Performance

To see how the RTX 4070 compares with some of its competitors, we looked at some benchmarks from various sources. We chose the following cards for comparison: the RTX 3080 (Founders Edition), the RTX 3070 Ti (Founders Edition), the RX 6800 XT (Reference), and the RX 6700 XT (Reference). These cards are either similar in price or performance to the RTX 4070.

Here are some of the key differences between these cards:

Card GPU Cores Clocks Memory Bus Bandwidth TDP Price
RTX 4070 AD104 5888 1920 / 2475 MHz 12 GB GDDR6X 192-bit 504 GB/s 200 W $599
RTX 3080 GA102 8704 1440 /1710 MHz 10 GB GDDR6X 320-bit 760 GB/s 320 W $699
RTX 3070 Ti GA104 6144 1500 / 1770 MHz 8 GB GDDR6X 256-bit 608 GB/s 290 W $599
RX 6800 XT Navi 21 XT 4608 2015 / 2250 MHz 16 GB GDDR6 256-bit 512 GB/s 300 W $649
RX 6700 XT Navi 22 XT 2560 2424 / 2581 MHz 12 GB GDDR6 192-bit 384 GB/s 230 W $479

As we can see from the comparison chart, the RTX 4070 stands out with its impressive performance-to-price ratio. It outperforms the RTX 3070 Ti and is comparable to the RTX 3080 while being priced the same as the former. The card also consumes less power than the RTX 3080, making it more efficient.

In terms of gaming performance, the RTX 4070 shines in titles that use ray tracing and DLSS. It provides a smoother and more immersive experience compared to the RX 6800 XT and RX 6700 XT, which lack ray tracing capabilities. The card also performs well in non-ray tracing titles, but the difference between it and the competition is not as significant.

Final Thoughts

The NVIDIA GeForce RTX 4070 is a midrange graphics card that delivers high-end performance and features. It is ideal for gamers and creators who want a card that can handle demanding workloads with ease, without breaking the bank. The card offers excellent ray tracing and DLSS performance, efficient power consumption, and a competitive price.

While the RTX 4070 may not be the fastest or the most powerful graphics card on the market, it provides an excellent value proposition for its price point. It is a worthy upgrade for those who are looking to upgrade from a previous generation card, or for those who want to build a new PC with a limited budget. Overall, the RTX 4070 is a midrange king that strikes the perfect balance between performance, price, and power efficiency.

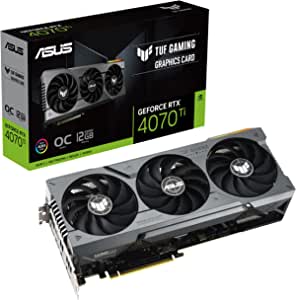
Asus-Tuf-RTX-4070Ti

NVIDIA GeForce RTX 4070 Ti: A New Era of Gaming Performance

Introduction

The NVIDIA GeForce RTX 4070 Ti is the latest addition to the company's line-up of high-performance graphics cards. Originally planned to be released as the RTX 4080 12GB, NVIDIA decided to rebrand the card as the RTX 4070 Ti to better position it within their product stack. Designed to deliver exceptional gaming experiences, the RTX 4070 Ti is built on the advanced Ada Lovelace architecture and features cutting-edge technologies such as ray tracing, DLSS, and more. In this article, we will explore the specifications, features, and performance of the RTX 4070 Ti, and discuss how it compares to its predecessors and competitors.

Specifications

The NVIDIA GeForce RTX 4070 Ti boasts impressive specifications that make it a formidable contender in the gaming market. Some of the key specifications include:

- GPU Architecture: NVIDIA Ada Lovelace

- CUDA Cores: 7680

- Tensor Cores: 240

- RT Cores: 60

- Base Clock: 2,310 MHz

- Boost Clock: 2,610 MHz

- Memory: 12 GB GDDR6X

- Mem Interface: 192-bit

- Memory Bandwidth: 504.2 GB/s

- TDP: 285 W


Ray Tracing and DLSS

One of the standout features of the RTX 4070 Ti is its support for real-time ray tracing, which enables more realistic lighting, shadows, and reflections in games. The dedicated RT Cores on the GPU accelerate ray tracing calculations, allowing for a significant performance boost compared to traditional rasterization techniques.

Additionally, the RTX 4070 Ti supports NVIDIA's Deep Learning Super Sampling (DLSS) technology, which uses artificial intelligence to upscale lower-resolution images in real time. This results in improved image quality with minimal performance impact, allowing gamers to enjoy higher frame rates without sacrificing visual fidelity.


Performance

The GeForce RTX 4070 Ti delivers outstanding performance in both traditional rasterized games and those that utilize ray tracing. In 1440p gaming, the RTX 4070 Ti consistently outperforms its predecessor, the RTX 3070 Ti, by a significant margin. It also competes favorably with AMD's Radeon RX 6900 XT, offering similar performance in many titles.

When it comes to 4K gaming, the RTX 4070 Ti is capable of delivering smooth frame rates in most modern titles, although some particularly demanding games may require lowering graphical settings for optimal performance. With DLSS enabled, the RTX 4070 Ti can achieve even better performance in supported games, making it an excellent choice for gamers seeking high-quality 4K experiences.


Comparison to Predecessors and Competitors

The RTX 4070 Ti represents a significant step forward compared to its predecessor, the RTX 3070 Ti. With more CUDA cores, higher clock speeds, and increased memory capacity, the RTX 4070 Ti offers a substantial performance improvement across a wide range of games and applications.

In comparison to its main competitor, the AMD Radeon RX 6900 XT, the RTX 4070 Ti holds its own in terms of performance. While the two cards trade blows in various titles, the RTX 4070 Ti's support for ray tracing and DLSS give it an edge in games that take advantage of these technologies.


Rebranding Decision

NVIDIA's decision to rebrand the card as the RTX 4070 Ti instead of the RTX 4080 12GB was likely influenced by several factors, including market positioning and product segmentation. By positioning the card as a 4070 Ti, NVIDIA can better differentiate it from the higher-end RTX 4080 and RTX 4090 models, while still offering a significant performance improvement over the previous generation. This rebranding strategy allows NVIDIA to cater to a wider range of gamers, offering a more diverse product line-up that meets the needs of various performance and budget requirements.


Conclusion

The NVIDIA GeForce RTX 4070 Ti is a powerful graphics card that delivers exceptional gaming performance, particularly in titles that support ray tracing and DLSS. With its advanced Ampere architecture and impressive specifications, the RTX 4070 Ti is an excellent choice for gamers seeking a high-performance GPU for 1440p and 4K gaming. As the latest addition to NVIDIA's lineup, the RTX 4070 Ti sets a new standard for gaming performance and ushers in a new era of immersive, visually stunning experiences. The rebranding decision from RTX 4080 12GB to RTX 4070 Ti demonstrates NVIDIA's commitment to offering a diverse range of products that cater to the needs of gamers across the performance spectrum.

Hynix X005

RTX 3060Ti Hynix Memory Issue and Samsung Solution

A significant number of RTX 3060Ti graphics cards using SK Hynix memory with the manufacturing code X005 have been found to have a defect that causes the memory to fail after a certain period. In this article, we will examine this issue and discuss how replacing the Hynix memory with Samsung memory can help resolve the problem.

What is the issue with the Hynix memory on the RTX 3060Ti?

The RTX 3060Ti uses GDDR6 memory, and various memory manufacturers produce it, including Samsung, Micron, and SK Hynix. Reports suggest that a specific batch of RTX 3060Ti graphics cards with Hynix memory using the manufacturing batch X005 has a manufacturing defect that causes the memory to fail after a certain period.

This defect affects the memory chips' timings, which the graphics card manufacturer sets to optimize the memory's stability and performance. The Hynix memory chips in the affected batch fail, leading to memory errors and instability that can cause crashes and artifacts. They have since resolved this issue in the later batches however, there are quite a number of cards already sold in the open market.

What are the signs of the issue?

Users have reported various symptoms, such as crashes, artifacts, and black screens, typically occurring during gaming or other graphics-intensive tasks. The issue is more noticeable when the graphics card is under load for an extended period.

How can replacing the Hynix memory with Samsung memory help?

One of the most effective solutions to the problem is replacing the Hynix memory with Samsung memory. Samsung memory chips have more optimal timings, and replacing the Hynix memory with Samsung memory can significantly improve the graphics card's stability and performance. This process requires specialized tools and knowledge, and it is not recommended for novice users to attempt it themselves. It is best to take your RTX 3060Ti to a professional graphics card repair technician who has experience with this procedure like Graphics Card Repairs.

What are the benefits of replacing Hynix memory with Samsung memory?

Replacing the Hynix memory with Samsung memory can enhance the graphics card's performance and stability. Samsung memory has more optimal timings, resulting in fewer memory errors and crashes, leading to a smoother gaming experience.

Moreover, replacing the Hynix memory with Samsung memory is a more long-term solution than merely adjusting the memory timings or underclocking the memory. By replacing the Hynix memory with Samsung memory, you can restore your RTX 3060Ti to its optimal performance and enjoy a smoother gaming experience without the worry of any issues arising in the future.

Do you have a video showing how to do it?

Fixing RTX 3060Ti - Hynix X005 Memory Upgrade for Stable Gaming and Crypto Mining.

Click on the image above to Play the video.

Timestamps:
0:00 - Introduction
2:30 – Windows Boot and Observations
6:18 – Running Memory Test
9:38 – Microscope Observation
12:23 – Replacing X005 Hynix Memory to Samsung
26:58 – Resistance Check and Straps Rearrangement
31:00 – Running Memory Test 2
35:42 – Replacing Faulty Memory
40:56 – Resistance Check
41:31 – Running Memory Test 3
43:32 – Windows Boot Test
46:04 – Stress Test
49:04– Conclusion

Conclusion

The RTX 3060Ti is a popular graphics card, but a manufacturing defect has caused a problem with a batch of graphics cards using Hynix memory with the manufacturing batch code X005. Replacing the Hynix memory with Samsung memory can significantly improve the graphics card's stability and performance. This process requires professional expertise, and it is best to take your RTX 3060Ti to a professional graphics card repair technician who has experience with this procedure. By replacing the Hynix memory with Samsung memory, you can restore your RTX 3060Ti to its optimal performance and enjoy a smoother gaming experience.

Asus Tuf RTX 3060 Ti - Does Hynix X005 impact Crypto Mining and Gaming? Here Is A Solution.
power-supply

Power Up: Upgrading to the Right Power Supply for Your Graphics Card

Upgrading your graphics card is an exciting experience for any PC gamer, as it allows you to enjoy better performance, graphics, and frame rates. However, to get the best out of your graphics card, you need to ensure that it has the right power supply.

The power supply unit (PSU) is responsible for delivering power to all the components in your PC, including the graphics card. A mismatch between the power supply and the graphics card can lead to instability, crashes, and even damage to your hardware. In this article, we'll take a look at what you need to know to upgrade to the right power supply for your graphics card, with a focus on transient spikes and the importance of having headroom in your power supply.

Transient Spikes and Their Impact on Power Supply

Transient spikes are sudden and brief surges of voltage that can occur in your PC's power supply. These spikes are typically caused by sudden changes in power demand, such as when your graphics card is under heavy load. While transient spikes are normal and often harmless, they can damage your hardware if they are too frequent or severe.

The impact of transient spikes on your graphics card depends on its quality and capacity. High-end graphics cards with more power-hungry components are more susceptible to transient spikes than their lower-end counterparts. A good power supply will have built-in safety features to protect your hardware from transient spikes and other power-related issues.

Safety Features Required in Power Supply

When upgrading your power supply, there are several safety features you should look for. These features will help protect your hardware from power-related issues and ensure that your PC runs smoothly and reliably.

Overvoltage Protection (OVP)

OVP is a safety feature that protects your hardware from damage due to excessive voltage. When the voltage in your PC exceeds a certain threshold, OVP will kick in and shut down the power supply to prevent any damage. This feature is essential for protecting your graphics card and other components from damage due to transient spikes.

Overcurrent Protection (OCP)

OCP is a safety feature that protects your hardware from damage due to excessive current. When the current in your PC exceeds a certain threshold, OCP will shut down the power supply to prevent any damage. This feature is essential for protecting your graphics card and other components from damage due to power surges.

Short-Circuit Protection (SCP)

SCP is a safety feature that protects your hardware from damage due to a short circuit. When a short circuit occurs, SCP will shut down the power supply to prevent any damage. This feature is essential for protecting your graphics card and other components from damage due to power surges.

Overload Protection (OPP)

OPP is a safety feature that protects your hardware from damage due to excessive power consumption. When the power consumption in your PC exceeds a certain threshold, OPP will shut down the power supply to prevent any damage. This feature is essential for protecting your graphics card and other components from damage due to power surges.

The Importance of Having Headroom in Your Power Supply

It's important to note that your power supply should have some headroom to accommodate transient spikes. This means that the wattage of your power supply should be slightly higher than the maximum power consumption of your components.

When your graphics card experiences a sudden spike in power demand, such as during intense gaming or graphic rendering, it can draw more power than usual from the power supply. If your power supply is not designed to handle these transient spikes, it may become overloaded and shut down, or worse, damage your hardware.

Having some headroom in your power supply can help absorb these transient spikes without causing any issues. For example, if your graphics card requires 500 watts of power, it's recommended to use a power supply with a wattage of 600 or 650 watts. This will ensure that the power supply can handle any sudden spikes in power demand without being overloaded.

Additionally, having headroom in your power supply can also help extend the lifespan of your components. A power supply that is operating at its maximum capacity can run hotter and wear out faster than one that has some headroom.

Conclusion

Upgrading to the right power supply for your graphics card is crucial for ensuring the longevity and stability of your PC. When choosing a power supply, look for safety features such as OVP, OCP, SCP, and OPP to protect your hardware from power-related issues. It's also essential to have some headroom in your power supply to accommodate transient spikes and extend the lifespan of your components. By following these guidelines, you can ensure that your PC runs smoothly and reliably, even during intense gaming or graphic rendering.

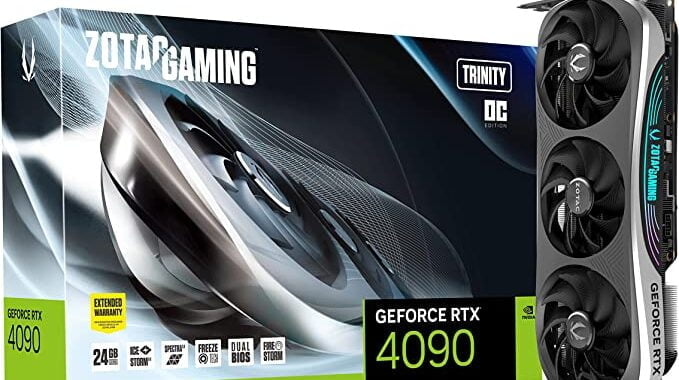
Nvidia RTX 4090

Elevate Your Gaming and Video Editing Experience: A Step-by-Step Guide to Upgrading Your Graphics Card

Upgrading your graphics card is a great way to boost the performance of your computer, especially when it comes to gaming and video editing. In this article, we'll take a look at the steps involved in upgrading your graphics card, and what you need to consider before making the switch.

Step 1: Research Your Compatibility and Budget

Before you start shopping for a new graphics card, it's important to do some research to ensure that your computer is compatible with the card you have in mind. Check your computer's manual or specifications to see what type of graphics card slot you have, as well as the power supply and cooling capabilities of your computer. Also, determine your budget for the upgrade, as graphics cards can range in price from less than $100 to more than $1,000.

Step 2: Remove the Old Graphics Card

Once you've chosen a new graphics card and have it in hand, it's time to remove the old card. First, turn off your computer and unplug it from the power source. Then, open your computer's case and locate the existing graphics card. Gently disconnect any cables or connectors, and remove any screws or brackets holding the card in place. Carefully lift the card out of the slot and set it aside.

Step 3: Install the New Graphics Card

To install the new graphics card, start by following the manufacturer's instructions. First, ensure that any required power cables are connected to the card. Then, gently insert the card into the slot, being careful not to damage any of the components. Secure the card in place with screws or brackets, and reconnect any cables or connectors that you disconnected from the old card.

Step 4: Update Your Drivers and Settings

Once your new graphics card is installed, it's important to update your computer's drivers and settings for optimal performance. Visit the website of the graphics card manufacturer to download the latest drivers and software for your card. You may also need to adjust your computer's settings, such as screen resolution and refresh rate, to get the most out of your new card.

Step 5: Consider Upgrading Your Power Supply

If your new graphics card requires more power than your existing power supply can provide, you may need to upgrade your power supply. A power supply upgrade can ensure that your computer has enough power to run all of its components, including the new graphics card.

Step 6: Test Your New Graphics Card

Before you start using your computer again, it's important to test your new graphics card to ensure that it's functioning properly. Start by turning on your computer and checking that your display is working correctly. Then, run some benchmarks or games to test the performance of the new card. If everything seems to be working well, you can enjoy your upgraded experience.

In conclusion, upgrading your graphics card is a great way to improve the performance of your computer, especially for gaming and video editing. By following the steps outlined above, you can ensure a smooth and successful upgrade, and get the most out of your new graphics card.

Graphics Card Problems

Common Graphics Card Problems and How to Fix Them

Graphics cards are an essential component of any gaming or graphics-intensive system. However, like any other electronic component, graphics cards are prone to problems. If you are experiencing issues with your graphics card, you are not alone. In this article, we will discuss some common graphics card problems and how to fix them.


Common Graphics Card Problems -- Overheating:

Graphics cards generate a lot of heat, and if they get too hot, they can cause performance issues or even damage the card. Overheating can be caused by poor ventilation, dust build-up, or an inadequate cooling system. This is one of the common graphics card problems. To fix this issue, you can try the following:

- Clean your graphics card: Dust build-up can obstruct airflow and cause overheating. Use compressed air or a soft brush to remove dust from the graphics card.

- Improve ventilation: Make sure your computer has adequate ventilation. If your computer case has a fan, make sure it is working correctly and positioned to blow cool air over the graphics card.

- Upgrade your cooling system: If you have a high-end graphics card, you may need to upgrade your cooling system. You can install additional fans, replace the stock heatsink and fan with an aftermarket solution, or consider liquid cooling.


Driver problems:

Drivers are software programs that allow your operating system to communicate with your graphics card. If your drivers are outdated, corrupt, or incompatible with your system, you may experience graphics issues. To fix this issue, you can try the following:

- Update your drivers: Check the manufacturer's website for the latest drivers for your graphics card. Download and install the latest drivers, and then restart your computer.

- Roll back your drivers: If you recently updated your drivers and are experiencing issues, you can try rolling back to a previous version. Go to Device Manager, right-click your graphics card, and select Properties. Then, click the Driver tab and click Roll Back Driver.

- Uninstall and reinstall your drivers: If updating or rolling back your drivers doesn't work, you can try uninstalling and reinstalling your drivers. Use a program like Display Driver Uninstaller to remove your old drivers completely, and then reinstall the latest drivers.


Artifacting:

Artifacting is a graphics issue that causes abnormal visual artifacts, such as lines, dots, or squares, to appear on your screen. Artifacts can be caused by overheating, overclocking, or a defective graphics card. To fix this issue, you can try the following:

- Lower your graphics settings: Overclocking your graphics card can cause artifacts. Lower your graphics settings and see if the issue persists.

- Check your cables: Loose or damaged cables can cause artifacts. Check your cables and make sure they are secure and undamaged.

- Replace your graphics card: If none of the above solutions work, you may need to replace your graphics card.


In conclusion, graphics card problems can be frustrating, but many of them are fixable. If you are experiencing issues with your graphics card, try the solutions outlined in this article, and if all else fails, contact Graphics Card Repairs for assistance and we will resolve it for you.

Graphics Card

Graphics Card Maintenance: Why It’s Important!

Graphics cards are a critical component of any modern PC, providing the horsepower necessary to run games, video editing, and other demanding applications. However, they require regular maintenance to keep them running optimally. In this article, we'll discuss the importance of regular graphics card maintenance, including the need to replace thermal paste, clean the cooler fins, and check thermal pads.

Why Graphics Card Maintenance is Important

Over time, dust and debris can accumulate inside your computer case and on your graphics card's cooling system. This can cause your graphics card to overheat, resulting in reduced performance, system instability, and even hardware failure. In extreme cases, overheating can cause damage to the GPU, memory chips, and other components on the card. To prevent these issues, it's essential to perform regular graphics card maintenance.

Thermal Paste Replacement

One of the most critical maintenance tasks for a graphics card is the replacement of thermal paste. Thermal paste is a compound that sits between the GPU and the heatsink to help transfer heat away from the chip. Over time, the thermal paste can dry out and lose its effectiveness, reducing the cooling efficiency of the GPU. In some cases, the old thermal paste can even cause overheating, leading to hardware damage.

For those who use their graphics card for mining, the thermal paste should be replaced every six months. In other scenarios, the thermal paste should be replaced every two years. Replacing thermal paste is a simple process that involves removing the heatsink from the GPU, cleaning off the old paste, applying a new layer, and reattaching the heatsink.

Cleaning the Cooler Fins

Another important aspect of graphics card maintenance is cleaning the cooler fins. As mentioned earlier, dust and debris can accumulate inside the graphics card's cooling system, leading to reduced cooling efficiency. This can cause the GPU to overheat and result in performance issues. Cleaning the cooler fins can help restore the cooling efficiency of the GPU and prevent overheating.

To clean the cooler fins, first, remove the graphics card from the PC case. Use compressed air or a soft brush to gently remove the dust from the fins. Be careful not to damage the fins, as this can reduce cooling efficiency. Once the fins are clean, reattach the graphics card to the PC.

Checking Thermal Pad Consistency

Thermal pads are used to transfer heat away from components other than the GPU, such as VRAM and power delivery components. Over time, thermal pads can dry out and lose their consistency, reducing their effectiveness in transferring heat away from these components. To ensure that your graphics card is running at its best, it's essential to check the consistency of the thermal pads regularly.

To check the consistency of the thermal pads, remove the heatsink from the graphics card and inspect the pads. If the pads are dry, cracked, or have changed in thickness, they should be replaced. In general, thermal pads should be replaced every year for better performance.


The Benefits of Regular Graphics Card Maintenance

Regular maintenance of your graphics card can provide several benefits, including:

  • Improved Performance: A clean and well-maintained graphics card can run faster and smoother, improving your gaming or application experience.
  • Extended Lifespan: By taking care of your graphics card, you can help extend its lifespan and avoid costly repairs or replacements.
  • Reduced Noise: A dusty or poorly-maintained graphics card may run louder than necessary, but regular cleaning can help reduce the noise level.


At Graphics Card Repairs, we can help you achieve proper maintenance for your graphics card at a low fee. Our experienced technicians can provide valuable insights and assistance to ensure that your graphics card is running at its best. Remember, regular maintenance is essential to keep your graphics card running smoothly and efficiently.

Conclusion

In conclusion, graphics card maintenance is an essential aspect of keeping your PC running smoothly. Replacing thermal paste, cleaning the cooler fins, and checking thermal pad consistency are all critical tasks that should be performed regularly to ensure optimal performance and prevent hardware damage. By following these simple maintenance tips, you can extend the lifespan of your graphics card and enjoy a smooth, reliable performance for years to come. And if you need professional maintenance services, Graphics Card Repairs is here to help.

support-Bracket-2

Save Your Graphics Card With A Support Bracket!

Graphics cards have become an essential component for many PC users, whether you're a gamer, a content creator, or simply someone who needs a powerful GPU for work or research. However, as graphics cards become more powerful, they also become heavier, and this can cause a range of problems for users. A graphics card support bracket is a simple yet effective solution to these problems, providing a range of benefits that can ultimately save your graphics card from damage and prolong its lifespan.

Graphics-card-support-bracket

What is a Graphics Card Support Bracket?

A graphics card support bracket is a small metal or plastic bracket that attaches to your graphics card and your PC case to support the weight of your graphics card. By doing so, it can help prevent sagging, which is one of the most common problems associated with heavy graphics cards. Sagging can occur when a graphics card's weight puts too much strain on the PCIe slot, causing the card to bend or sag. This can ultimately lead to damage to the card or the motherboard, causing issues such as instability, crashes, or even failure.

How Sagging Can Damage Your Graphics Card

Sagging can cause a range of problems for your graphics card, including damage to the memory chips on the card. Memory chips are an essential part of a graphics card, storing the data that is used to create images on your screen. However, when a graphics card sags, the memory chips can become damaged due to the stress on the card. Over time, this damage can cause issues such as graphical artifacts, crashes, or even complete failure of the card.

How a Graphics Card Support Bracket Can Save Your Graphics Card

Prevents Sagging

The most significant benefit of using a support bracket is that it can prevent sagging. Sagging can cause significant damage to your graphics card and the PCIe slot on your motherboard, which can ultimately lead to failure. By using a support bracket, you can distribute the weight of your graphics card evenly, ensuring that it remains level and stable. This can help prevent sagging and ensure that your PCIe slot remains intact, ultimately prolonging the life of your graphics card.

Protects Against Damage

Graphics cards are expensive pieces of hardware, and the last thing you want is for your card to break due to sagging or contact damage. It can protect your graphics card against damage by keeping it stable and level. By preventing sagging, it can help ensure that your graphics card remains safe and secure, even during intense gaming sessions or demanding workloads.

Improves Airflow

Another benefit of using a graphics card support bracket is that it can improve airflow in your PC case. When a graphics card sags, it can obstruct airflow, which can lead to overheating and performance issues. By keeping the card level, a support bracket can improve airflow and help keep your PC running cool. This can ultimately lead to better performance, fewer crashes, and a longer lifespan for your graphics card and other components.

Easy to Install

Support brackets are easy to install and can be attached to your graphics card and PC case with screws or adhesive. They come in various sizes and shapes to fit different graphics card models, so it's essential to choose one that fits your card correctly. Most support brackets can be installed within minutes and require no special tools or technical knowledge.

Conclusion

In conclusion, a graphics card support bracket is a simple yet effective solution to prevent sagging and damage to your graphics card. By keeping the card level and stable, a support bracket can improve airflow, protect your card from damage, and ultimately extend its lifespan. If you have a heavy graphics card or are experiencing issues with sagging, investing in a support bracket can be a smart choice. The benefits of using a bracket go beyond just preventing damage to your graphics card. By improving airflow and protecting against damage, it can ultimately help improve the performance and longevity of your entire PC.

When shopping for a support bracket, be sure to choose one that fits your graphics card model and is made of durable materials. While it may seem like a small investment, it can ultimately save you money and frustration by preventing damage to your expensive graphics card. A graphics card support bracket is an essential accessory for anyone who uses a heavy graphics card. By preventing sagging and protecting against damage, it can help prolong the life of your graphics card and improve the performance of your entire PC. Whether you're a gamer, a content creator, or simply someone who needs a powerful GPU for work, investing in a support bracket can be a smart choice.


Nvidia RTX 4080

Nvidia RTX 4080

Nvidia RTX 4080: The Ultimate Graphics Card for Gamers and Creators

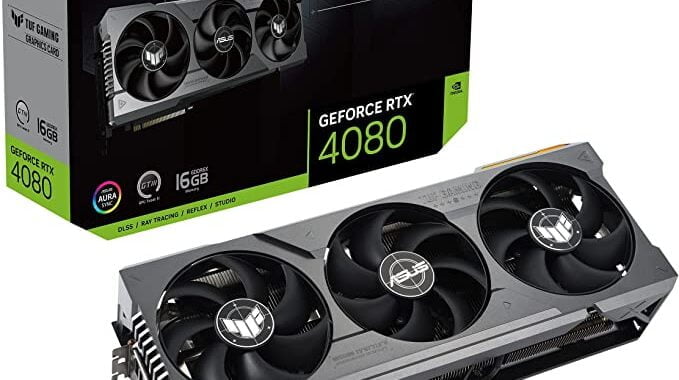
If you are looking for the best graphics card in the market, you might want to check out the Nvidia RTX 4080. This card delivers ultra-performance features that enthusiast gamers and creators demand. It is powered by the Nvidia Ada Lovelace architecture and 16GB of superfast GDDR6X memory.

What is Nvidia Ada Lovelace?

Nvidia Ada Lovelace is the codename for the next-generation GPU architecture from Nvidia. It is named after Ada Lovelace, a 19th-century mathematician and computer pioneer. The design is more efficient, powerful, and scalable than the previous Ampere architecture. It features seven Graphics Processing Clusters (GPCs), 76 Streaming Multiprocessors (SMs), and 64MB of L2 cache. Each SM has 128 CUDA cores, four Tensor cores, and one Ray Tracing core. The total number of CUDA cores is 9,728, which is 28% more than the RTX 3080. The RTX 4080 also has a high clock speed of up to 2,510MHz, which is 35% faster than the RTX 3080. The memory bandwidth is 716.8 GB/s.


What can you do with the RTX 4080?

The RTX 4080 can handle any game or creative project you throw at it. It supports ray tracing and AI-powered graphics, which enable realistic lighting, shadows, reflections, and effects. RTX 4080 also supports DLSS (Deep Learning Super Sampling), which uses AI to boost frame rates and image quality. The 4080 can run games at 4K resolution with ultra settings and ray tracing enabled. For example, it can achieve over 60 FPS in Cyberpunk 2077, Red Dead Redemption 2, and Watch Dogs: Legion. It can also run games at up to 8K resolution with DLSS enabled. RTX 4080 is also ideal for creators who work with video editing, animation, rendering, and streaming. It can accelerate applications such as Adobe Premiere Pro, Blender, DaVinci Resolve, OBS Studio, and more. It can also support multiple monitors and VR headsets.

How much does the RTX 4080 cost?

The RTX 4080 has a suggested retail price of USD 999. However, due to high demand and limited supply, it might be hard to find one at that price. You might have to pay a premium or wait for a restock. The RTX 4080 also has a high power consumption of 320W (TGP). This means you will need a powerful PSU (power supply unit) and a good cooling system to run it smoothly. You might also need a new motherboard and case to fit it into your PC.

Is the RTX 4080 worth it?

The RTX 4080 is undoubtedly a beast of a graphics card that can deliver amazing performance and features for gamers and creators. However, it is also very expensive and hard to get. You will need to consider your budget, your needs, and your PC setup before buying one. If you already have a high-end graphics card such as the RTX 3080 or the RX 6800 XT, you might not need to upgrade to the RTX 4080 right away. You can still enjoy most games and applications at high settings and resolutions.

If you have an older or lower-end graphics card such as the GTX 1080 or the RX 5700 XT, you might want to upgrade to the RTX 4080 if you can afford it and find it in stock. You will notice a significant improvement in performance and features. If you are building a new PC from scratch or have a very outdated graphics card such as the GTX 1060 or the RX 580, you might want to consider other options besides the RTX 4080. You might be able to find a cheaper or more available graphics card that can still meet your needs. The bottom line is that the RTX 4080 is an amazing graphics card that offers beyond-fast performance and features for gamers and creators.

How to buy the RTX 4080?

If you are interested in buying the RTX 4080, you might have to be patient and persistent. The RTX 4080 is in high demand and low supply, which means it is often sold out or overpriced. Here are some tips on how to buy the RTX 4080:

  • Check the official Nvidia website regularly. Nvidia sells the RTX 4080 directly on its website, but it often runs out of stock quickly. You can sign up for email notifications or use a browser extension to alert you when it is available.
  • Look for reputable online retailers. You can also buy the RTX 4080 from online retailers such as Amazon, Newegg, Best Buy, and more. However, you might have to pay a higher price than the MSRP or deal with scalpers and bots. You can use tools such as Stock Informer or NowInStock to track the availability and price of the RTX 4080.
  • Visit local stores. You can also try your luck at local stores such as Micro Center, Fry’s Electronics, or GameStop. You might have a better chance of finding the RTX 4080 in stock or at a reasonable price. However, you might have to wait in line or call ahead to check the inventory.
  • Join online communities. You can also join online communities such as Reddit, Discord, Twitter, or Facebook that are dedicated to finding and sharing deals on graphics cards. You might get some helpful tips, links, or alerts from other users who are looking for the RTX 4080.

The RTX 4080 is a great graphics card that can enhance your gaming and creative experience. However, it is not easy to buy one at this time. You will need to be prepared, flexible, and lucky to get your hands on one.

Conclusion

The RTX 4080 is the ultimate graphics card for gamers and creators who want ultra-performance features. It is powered by the Nvidia Ada Lovelace architecture and 16GB of superfast G6X memory. It supports ray tracing and AI-powered graphics, which enable realistic lighting, shadows, reflections, and effects. It can run games at 4K resolution with ultra settings and ray tracing enabled. It can also accelerate applications such as video editing, animation, rendering, and streaming.

However, the RTX 4080 is also very expensive and hard to get. It has a suggested retail price of USD 999, but it might be sold out or overpriced due to high demand and low supply. It also has a high power consumption of 320W (TGP), which means you will need a powerful PSU (power supply unit) and a good cooling system to run it smoothly. You might also need a new motherboard and case to fit it into your PC.

Budget

Therefore, you will need to consider your budget, your needs, and your PC setup before buying the RTX 4080. If you already have a high-end graphics card such as the RTX 3080 or the RX 6800 XT, you might not need to upgrade to the RTX 4080 right away. If you have an older or lower-end graphics card such as the GTX 1080 or the RX 5700 XT, you might want to upgrade to the RTX 4080 if you can afford it and find it in stock. If you are building a new PC from scratch or have a very outdated graphics card such as the GTX 1060 or the RX 580, you might want to consider other options besides the RTX 4080.

The bottom line is that the RTX 4080 is an amazing graphics card that offers beyond-fast performance and features for gamers and creators. However, it is not for everyone and not easy to buy. You will need to weigh the pros and cons carefully before making your decision.

I hope this article has helped you learn more about the Nvidia RTX 4080 and how to buy one. Thank you for reading.